Need help with Vuukle?🤔
This is the place you are looking for!
How to enable cookie-pro CMP and Cookie banner via Vuukle
how toenablecookie-procmpcookie bannerUpdated over a month ago
Guide with clear steps on how to enable cookie-pro CMP and Cookie banner via Vuukle
Step by step instruction with screenshots - how to enable cookie-pro CMP and Cookie banner via Vuukle
- Open the cookie-pro site and click on the “Login” button. Fill with data in the Email and Password fields and click on the “Login” button
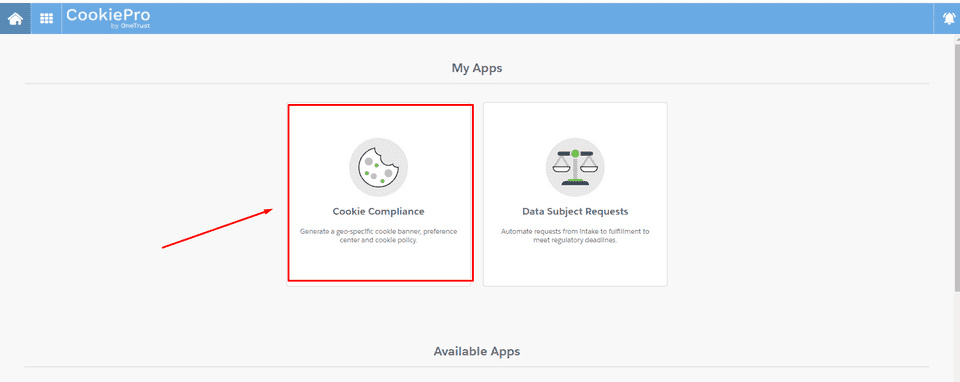
- In the CookiePro dashboard choose the “Cookie Compliance” option.
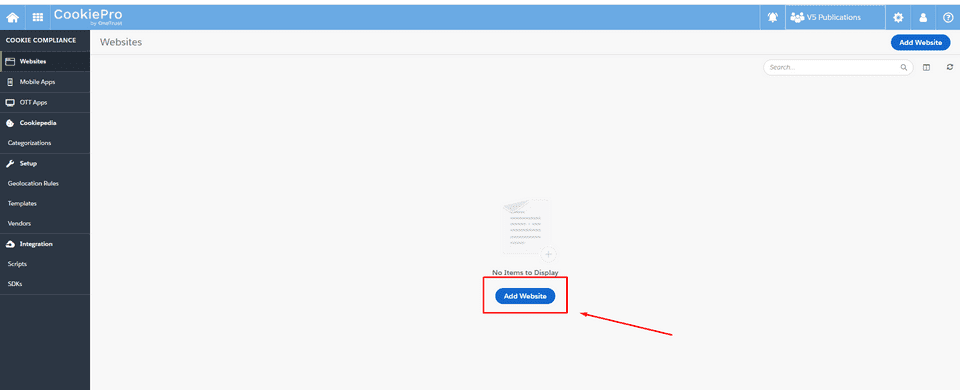
- Inside the “Cookie Compliance” click on the “Add Website” button
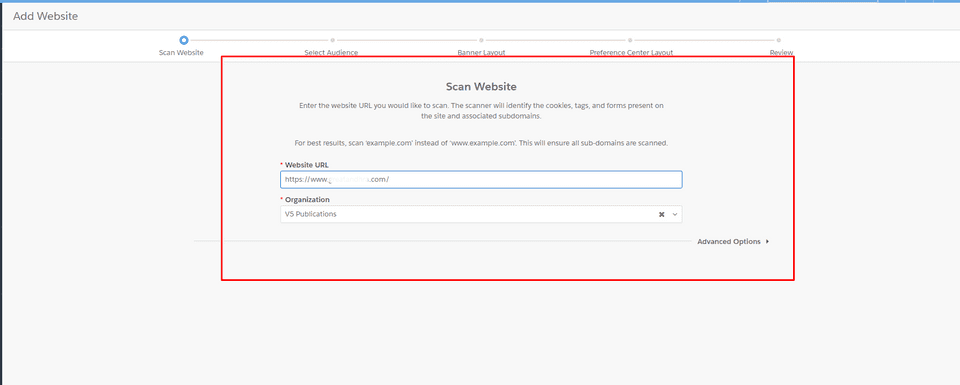
- After that, go through the CookiePro setup wizard here and let CookiePro scan your website for cookies. Enter your site URL, use “Advanced Options” if needed, and click on the “Next” button at the bottom of the page
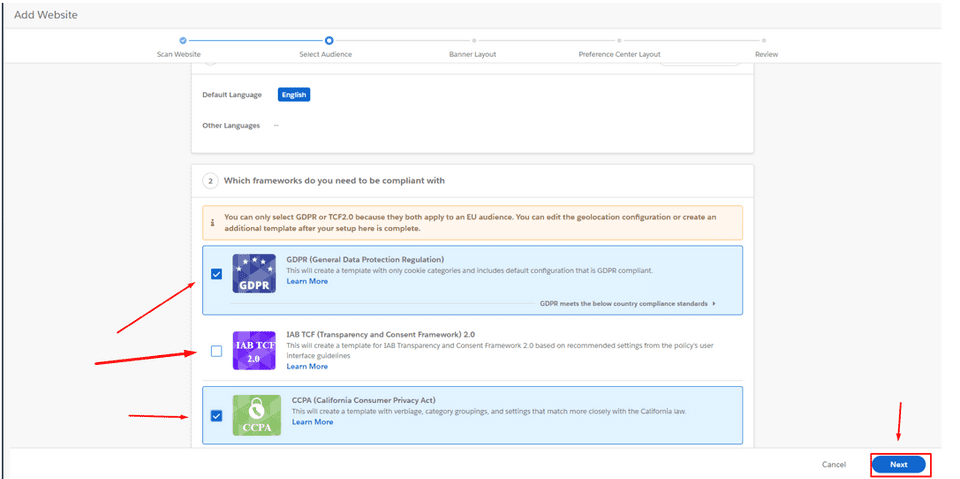
- Choose the language, GDPR, IAB TCF, and CCPA and click on the “Next” button
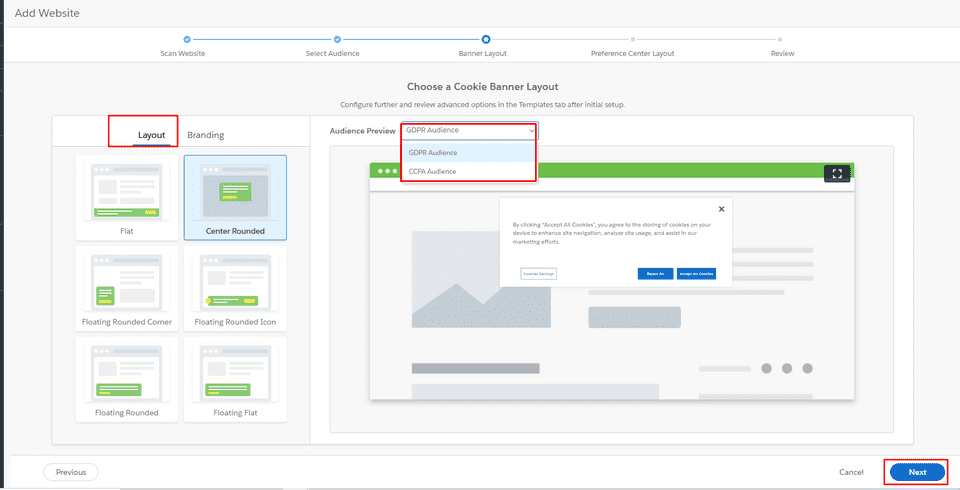
- Choose the “Layout” from the left side and click on the “Next” button
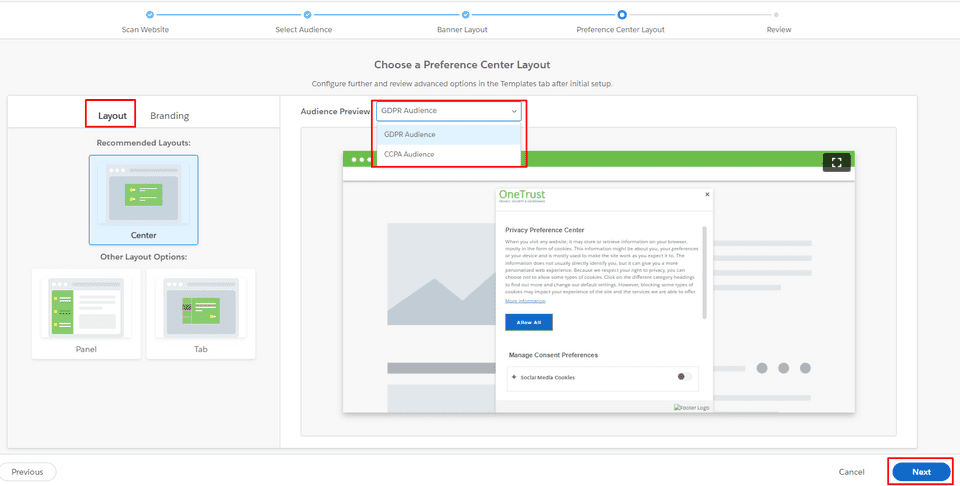
- Choose “Preference Center Layout” and click on the “Next” button
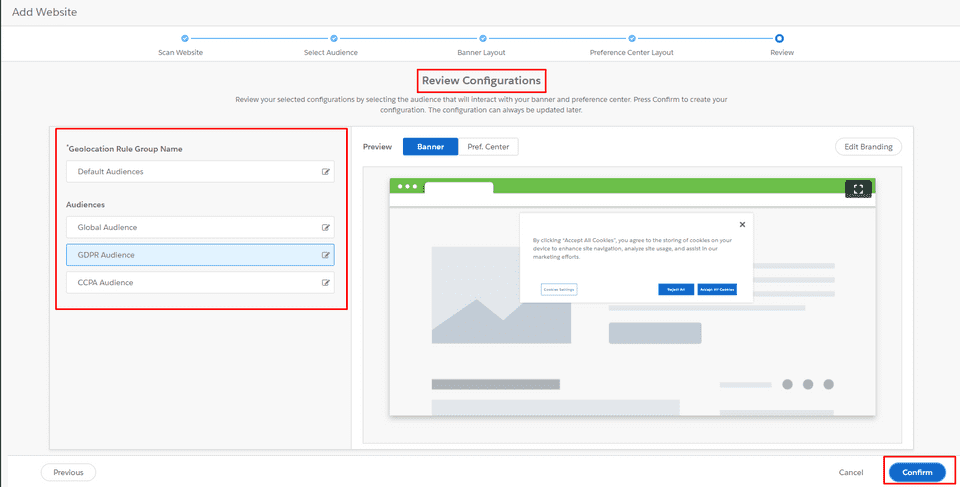
- Choose “Review Configuration” options and click on the “Confirm” button
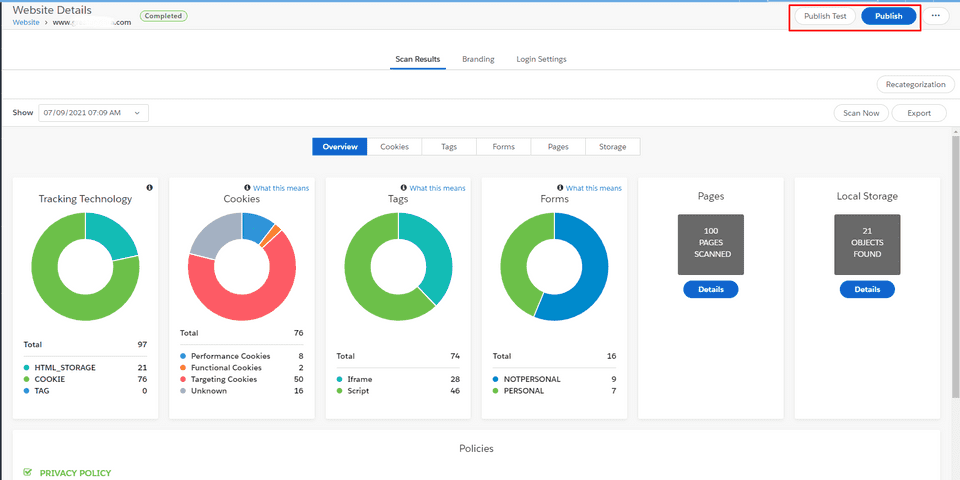
- Once the scan is complete you need to click on the “Publish test” button on your freshly scanned website. “Publish test” gives a test script that you can use to test your new layout settings.
Click on the “Publish” button if you think you’re done with the customization and you’re ready to add the script to the website so that Cookie-pro applies your settings.
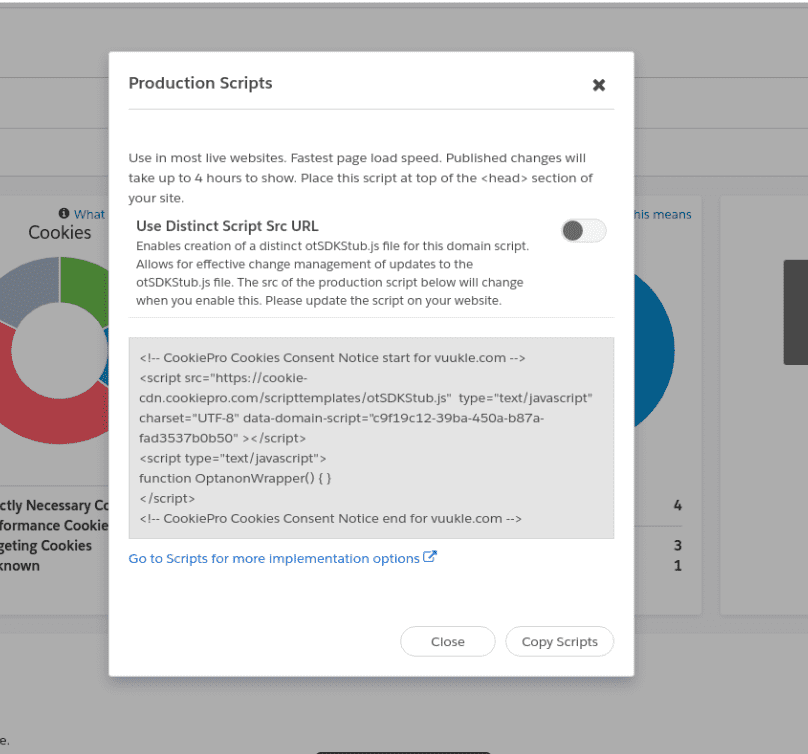
- After that, click on the “Copy Production Scripts” here. After pressing on the “Copy Production Scripts” button you can copy this script from the panel and insert it on your website.
Send us the contents of data-domain-script from the “Copy Production Scripts” panel script tag to support@vuukle.com and we can use that domain Id to insert your script from our side.

