Need help with Vuukle?🤔
This is the place you are looking for!
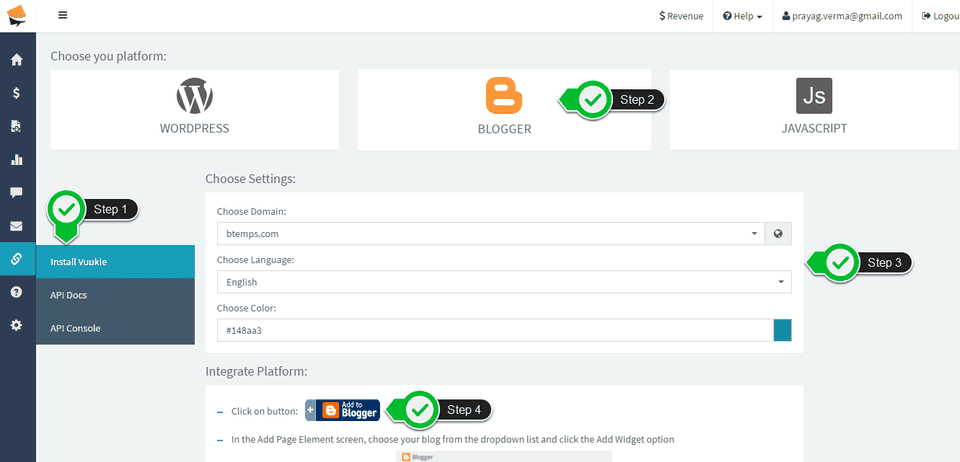
From the Vuukle Dashboard, choose the option to add the code to your Blogger blog. Do this by selecting the Chain links icon in the left sidebar, then clicking Install Vuukle, then customizing the look and feel of the widget and finally clicking on the button “Add to Blogger”
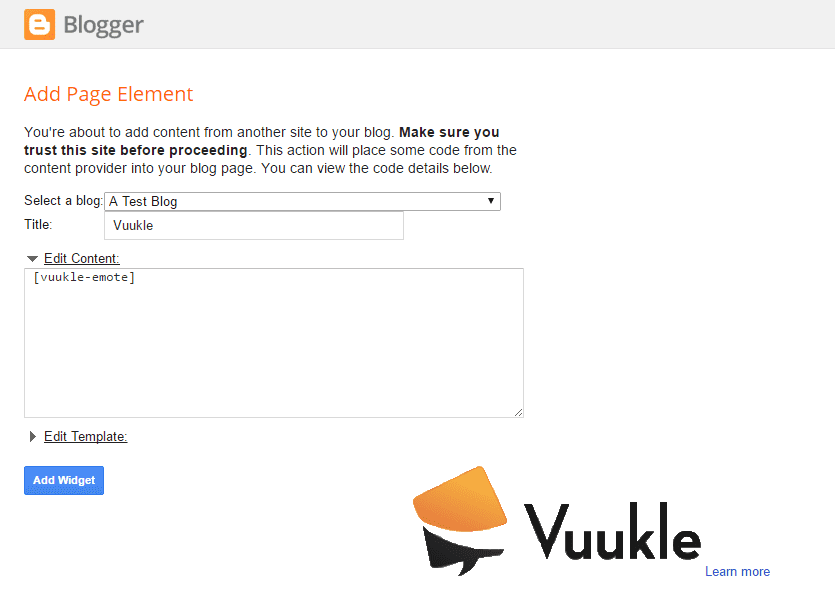
In the Add Page Element screen, choose your blog from the dropdown list and click the Add Widget option
Note: Make sure that the Vuukle HTML/JavaScript gadget is present below the Blog Posts gadget in the Layout tab. It should be either placed directly below the Blog Posts gadget or in the Footer region. Remember to press the “Save Arrangement” button after placing the Vuukle HTML/JavaScript gadget in the correct place.
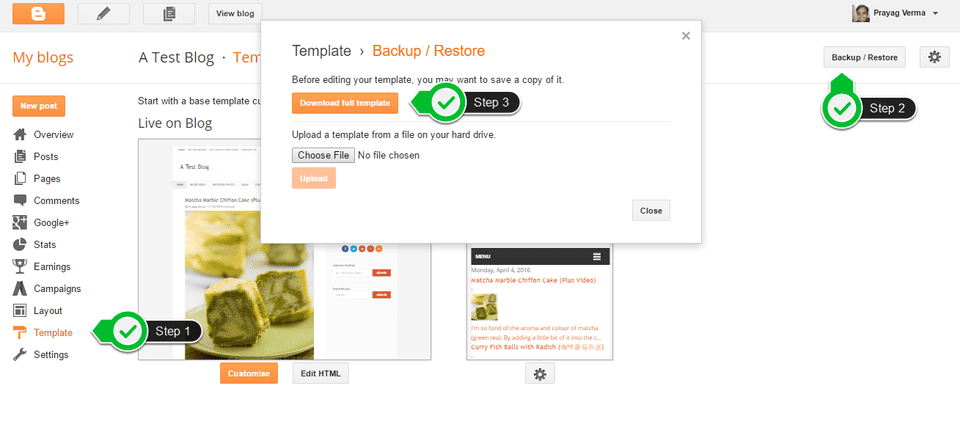
To complete the installation of Vuukle on your blog, you will have to do modifications in your Blogger Template. Before you get started with this process, make sure that you have taken a backup you’re current Template. To do so, go to Template tab in the Blogger dashboard, click the Backup / Restore button in the top Right corner and click the Download full templatebutton.
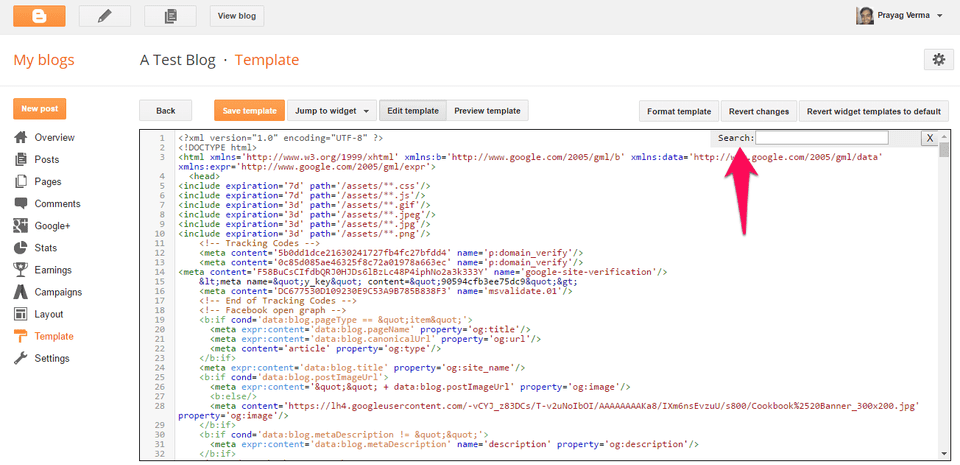
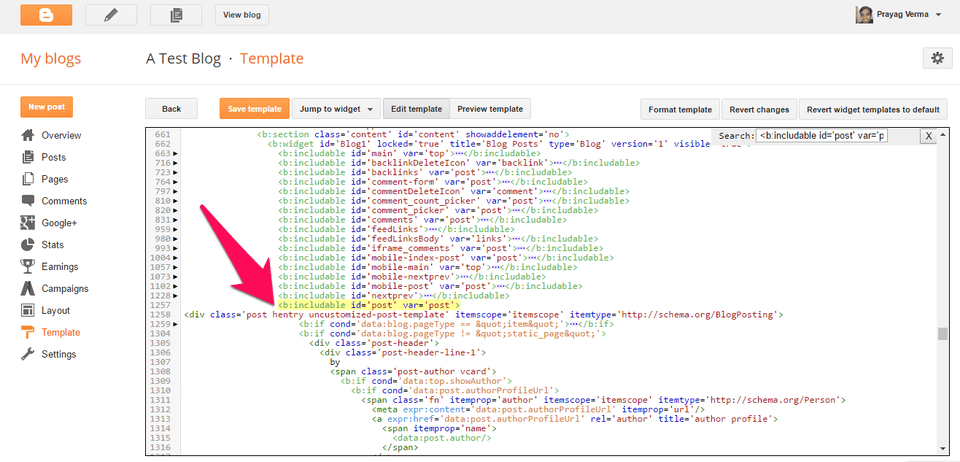
Now go into Templates tab > Edit HTML, once press inside the Template Editor area and then press CTRL+F (or Command+F if using a Mac device) and you should see a search box in the template editor at the top Right corner
In that search box enter the following <b:includable id='post' var='post'> and Press Enter. You will find a single instance of this in your template.
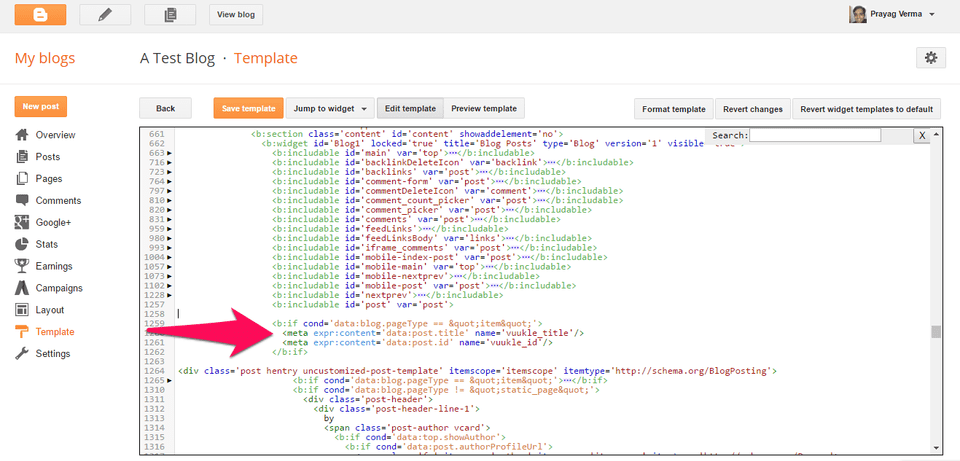
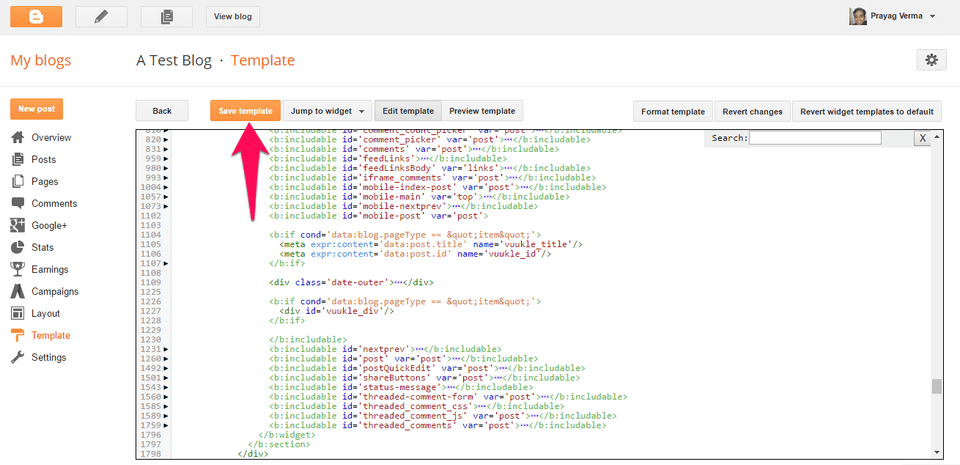
Add the following code just after <b:includable id='post' var='post'>
<b:if cond='data:blog.pageType == "item"'>
  <meta expr:content="data:post.title" name="vuukle_title" />
  <meta expr:content="data:post.id" name="vuukle_id" />
</b:if>
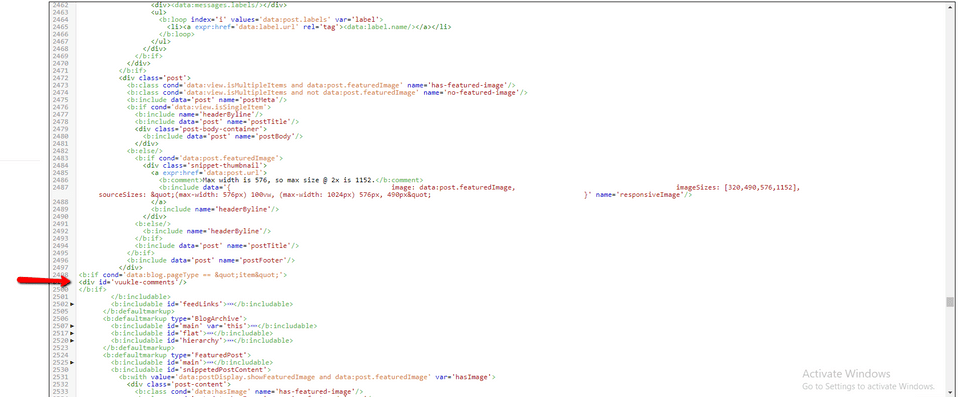
After that, add the following code just before the ending of <b:includable id='post' var='post'> section’s </b:includable> tag
<b:if cond='data:blog.pageType == "item"'>
  <div id="vuukle-comments" />
</b:if>
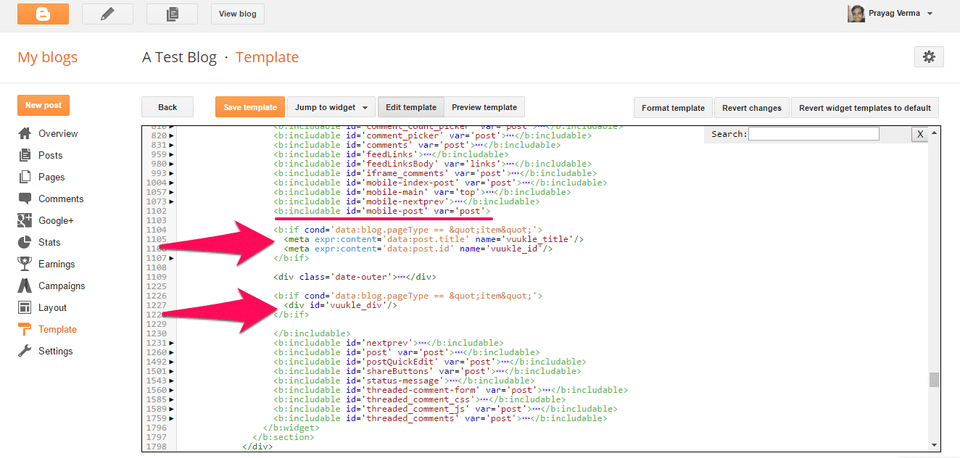
Repeat the last 2 steps for the <b:includable id='mobile-post' var='post'> section. This is needed to make sure that Vuukle works on the Mobile version of your blog as well.
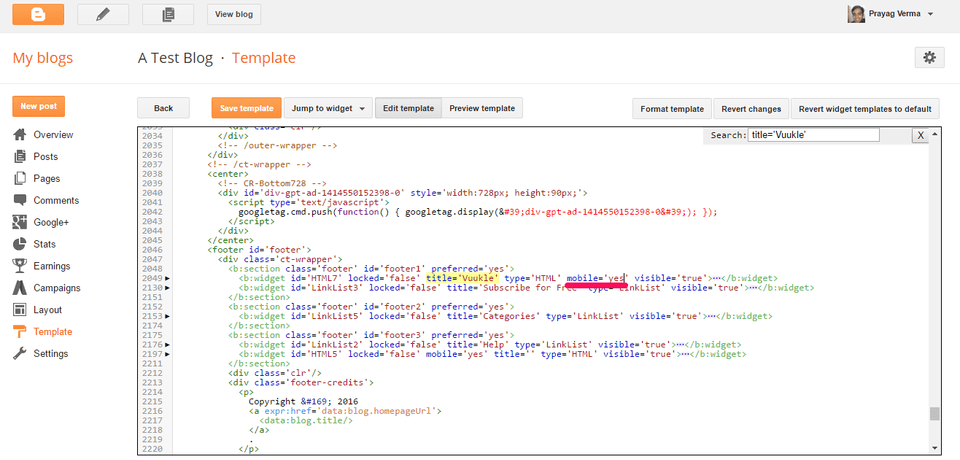
To make the widget appear on the mobile version of your blog, search for title='Vuukle' and add the mobile='yes' attribute on that particular <b:widget> tag.
Save the changes you have done in the template by clicking the Save template button
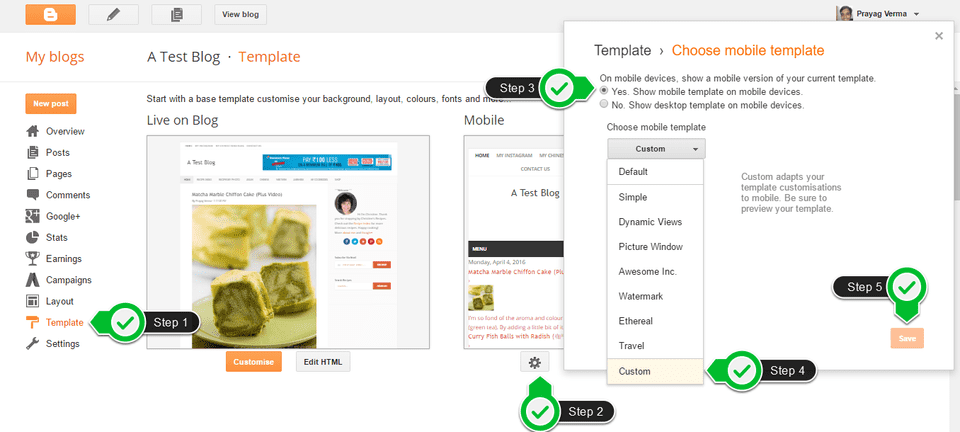
Make sure that you have enabled Custom Mobile template . To do so, go into Template Tab > Click the Gears Icon > Select Yes. Show mobile template on mobile devices option > Choose “Custom” from Choose mobile template dropdown > Save
Show Comment count on blog posts
You can show the comment count for each post by replacing the current comment count code. This would differ for every template but if you are using a default Blogger Template, then it would look like –
<span class="post-comment-link">
  <b:include data="post" name="comment_count_picker" />
</span>
Replace the above code with –
<b:if cond='data:blog.pageType == "index"'>
  <span class="vuukle-comment-count-container"
    ><a class="vuukle-comment-count" expr:href='data:post.url + "#vuukle-comments"' expr:data-id="data:post.id"></a
  ></span>
</b:if>
<b:if cond='data:blog.pageType == "item"'>
  <a class="comment" expr:href='data:post.url + "#vuukle-comments"' expr:data-vuukle="data:post.id">Comments</a>
</b:if>
Supported Shortcodes
Vuukle supports shortcodes to enable or disable certain set of features. You can add these shortcodes in the HTML/JavaScript widget named Vuukle in the Layout tab of the Blogger dashboard. The shortcodes are –
[vuukle-emote] – Enables “What is Your Reaction” section [vuukle-subscribe] – Enables the subscribe by email option under the post [vuukle-powerbar-bottom] – Enables Powerbar below the post content [vuukle-powerbar-top] – Enables Powerbar below the post title
