Need help with Vuukle?🤔
This is the place you are looking for!
Emote widget and everything you need to know about it
widgetsemoteswordpressjavascriptbloggerUpdated over a month ago
HOW TO ENABLE
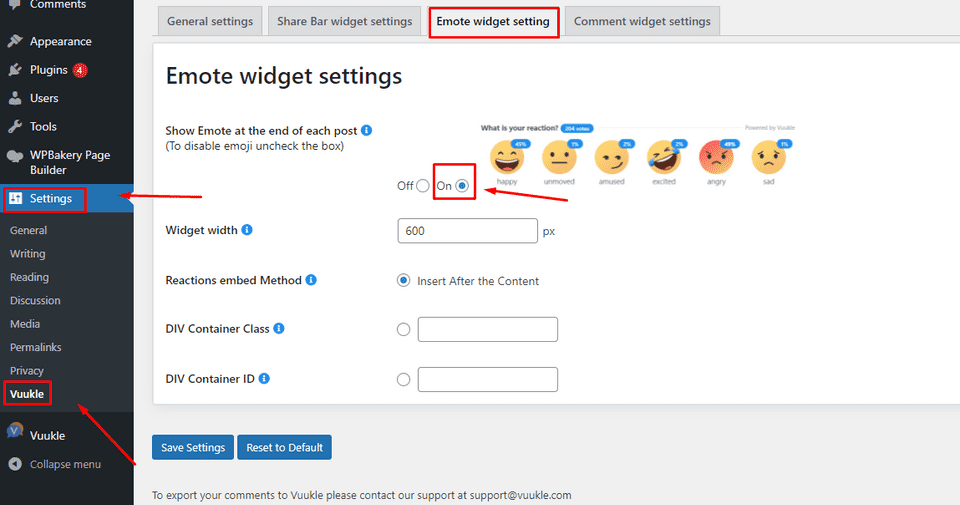
Enable Vuukle Emote widget using WordPress plugin:
In your WordPress Admin panel, go into Settings > Vuukle > Emote Widget settings and choose “On” for Show Emote at the end of each post option
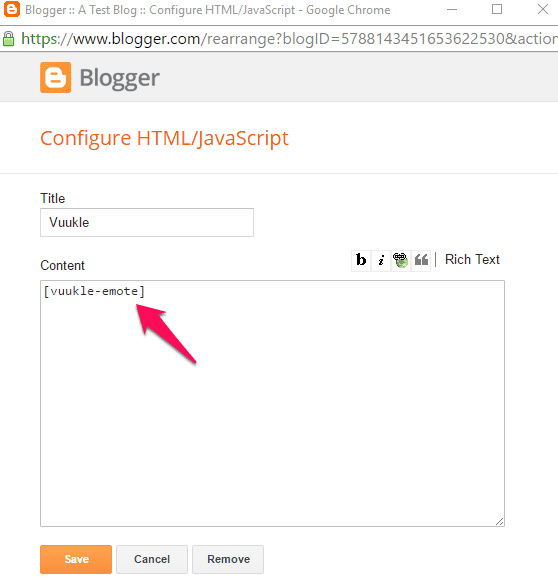
For Blogger:
In your Blogger dashboard, go into the Layout tab, edit the Vuukle HTML/JavaScript widget and insert the shortcode [vuukle-emote]. Then click the Save button.
For JavaScript:
In your website’s HTML, insert the following code where you want the Emotes widget to display
<div id="vuukle-emote" />HOW TO CUSTOMIZE
JS variables:
emotes: { enabled: true, //Enables Emote widget on the page hideRecommendedArticles: false, //Hides Article recommendations on Emote selection size:
undefined, // icons size firstImg: undefined, // Set here the image URL to the desired emoji or image firstName: 'Happy', //Change the name of the
Emote secondImg: undefined, secondName: 'Unmoved', thirdImg: undefined, thirdName: 'Amused', fourthImg: undefined, fourthName: 'Excited', fifthImg:
'https://upload.wikimedia.org/wikipedia/commons/1/10/Linea_5.png', fifthName: 'Angry', sixthImg: undefined, sixthName: 'Sad', disable: [], //You can
disable some emotes (Emotes id's 1,2,3,4,5,6) customText: {}, },
WordPress Settings
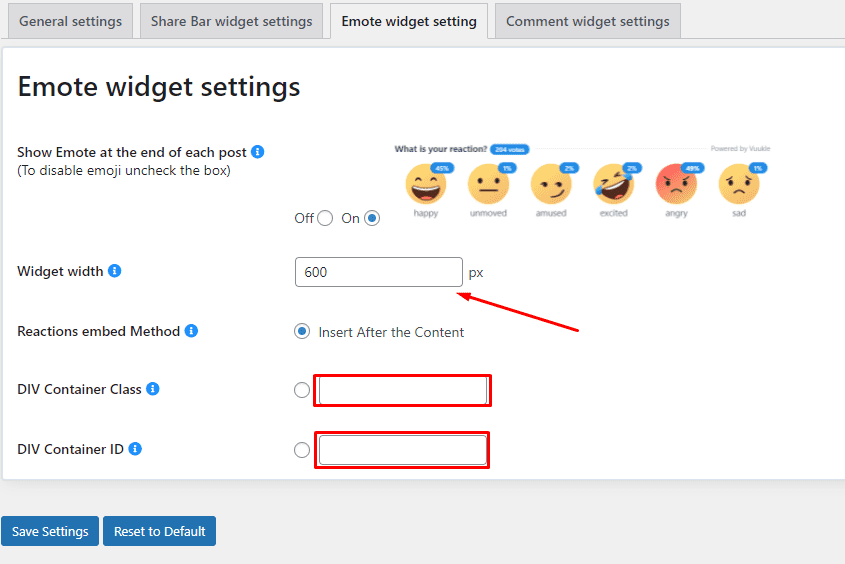
On WordPress Settings, you can change the “Widget width” and choose where the “Emote” widget should display on your site
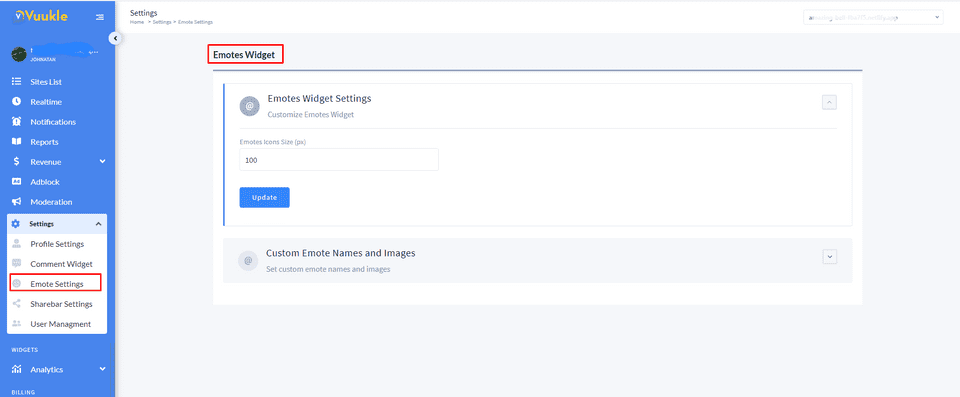
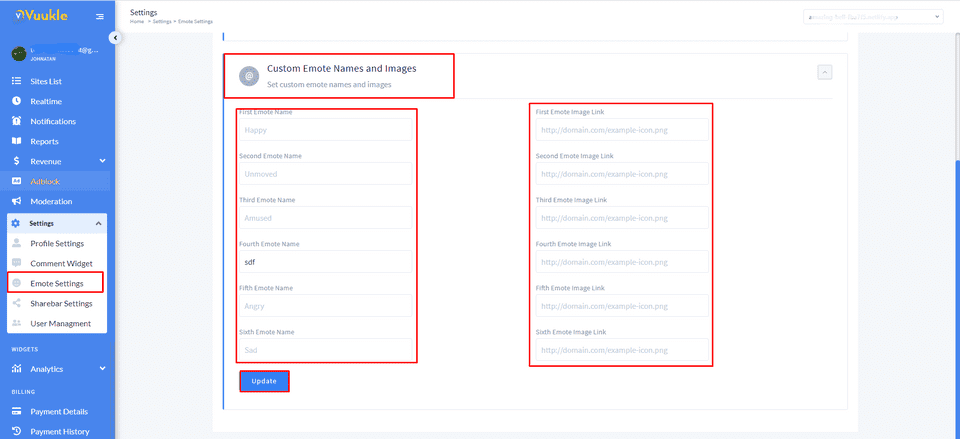
You can customize Emote widget the same as the JS variable list but with User-friendly settings look on the Vuukle admin panel. Go to the “Settings” - “Emote Settings” subpage
Related article:

